Create and send a repeatable Happy Birthday campaign

If you have a contact's birthday information stored in the list. You can create an automated campaign that is sented annually for their birthday or send special promotions on the right day. Which is a good way to engage with your contacts.

In this article, you will learn how to create and send a Happy Birthday campaign automatically to your contacts.
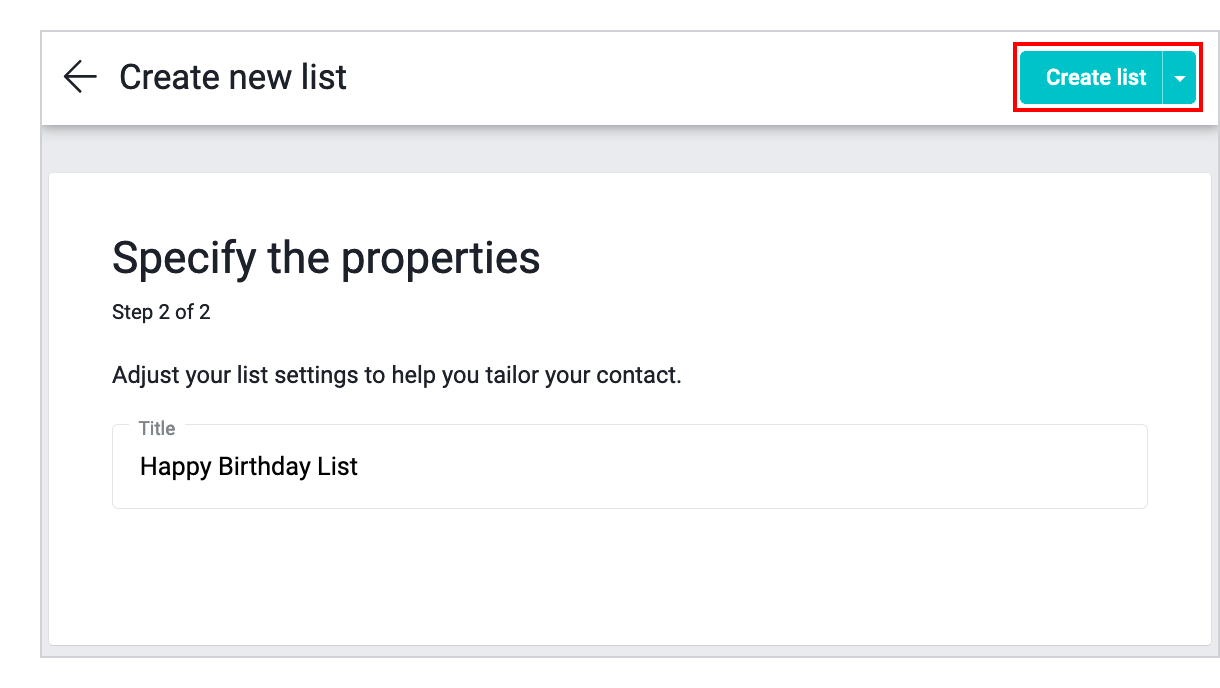
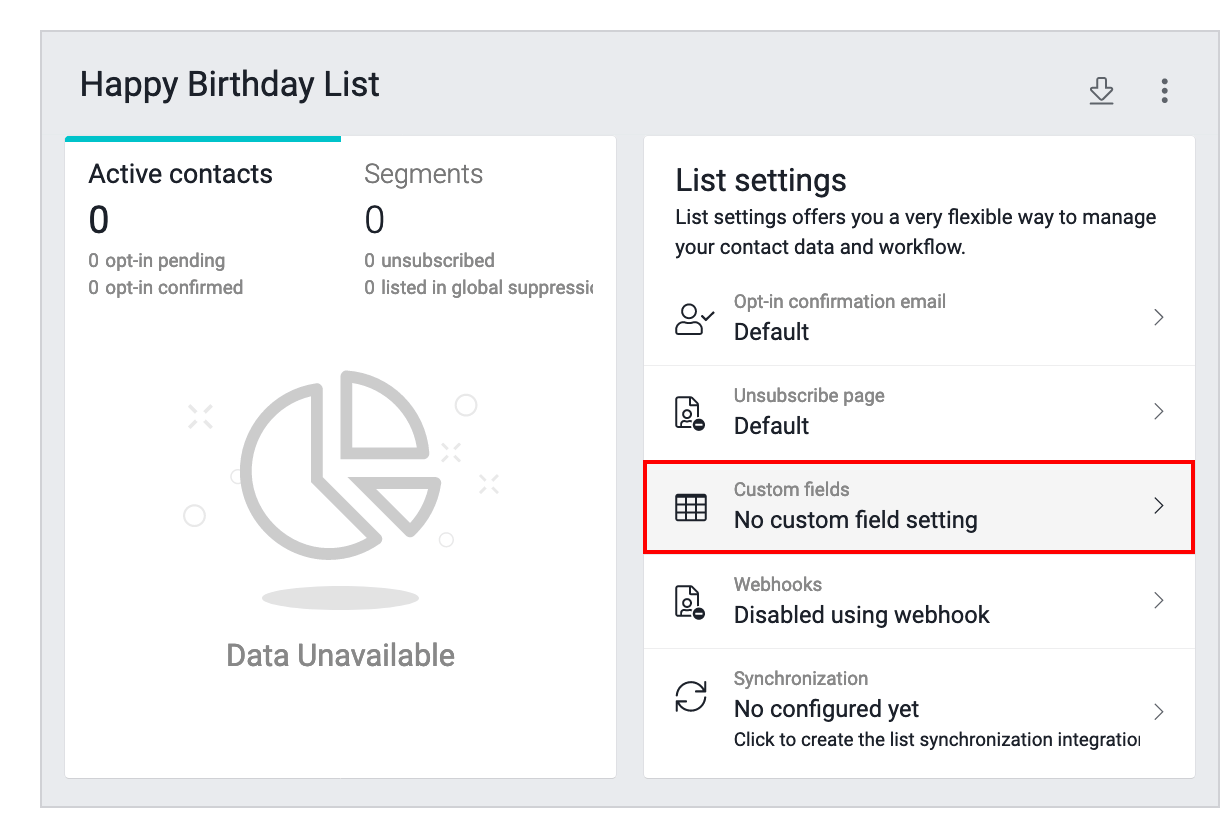
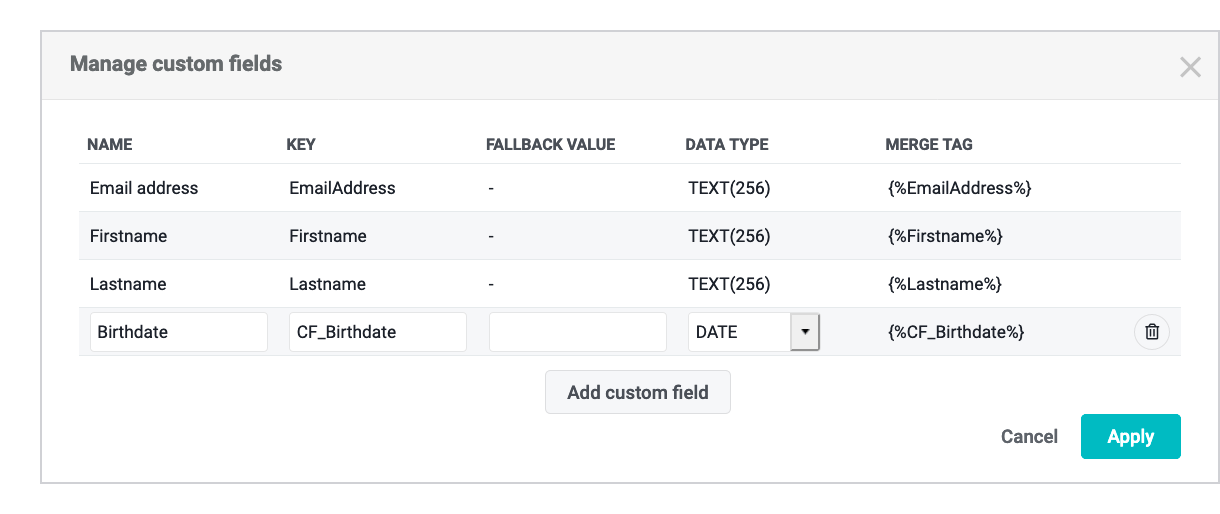
Create lists and fields for birthday

To create lists and fields for birthday, follow these steps:
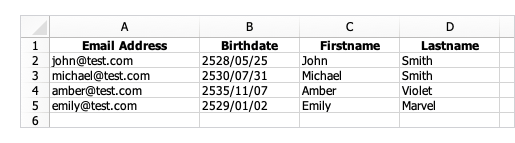
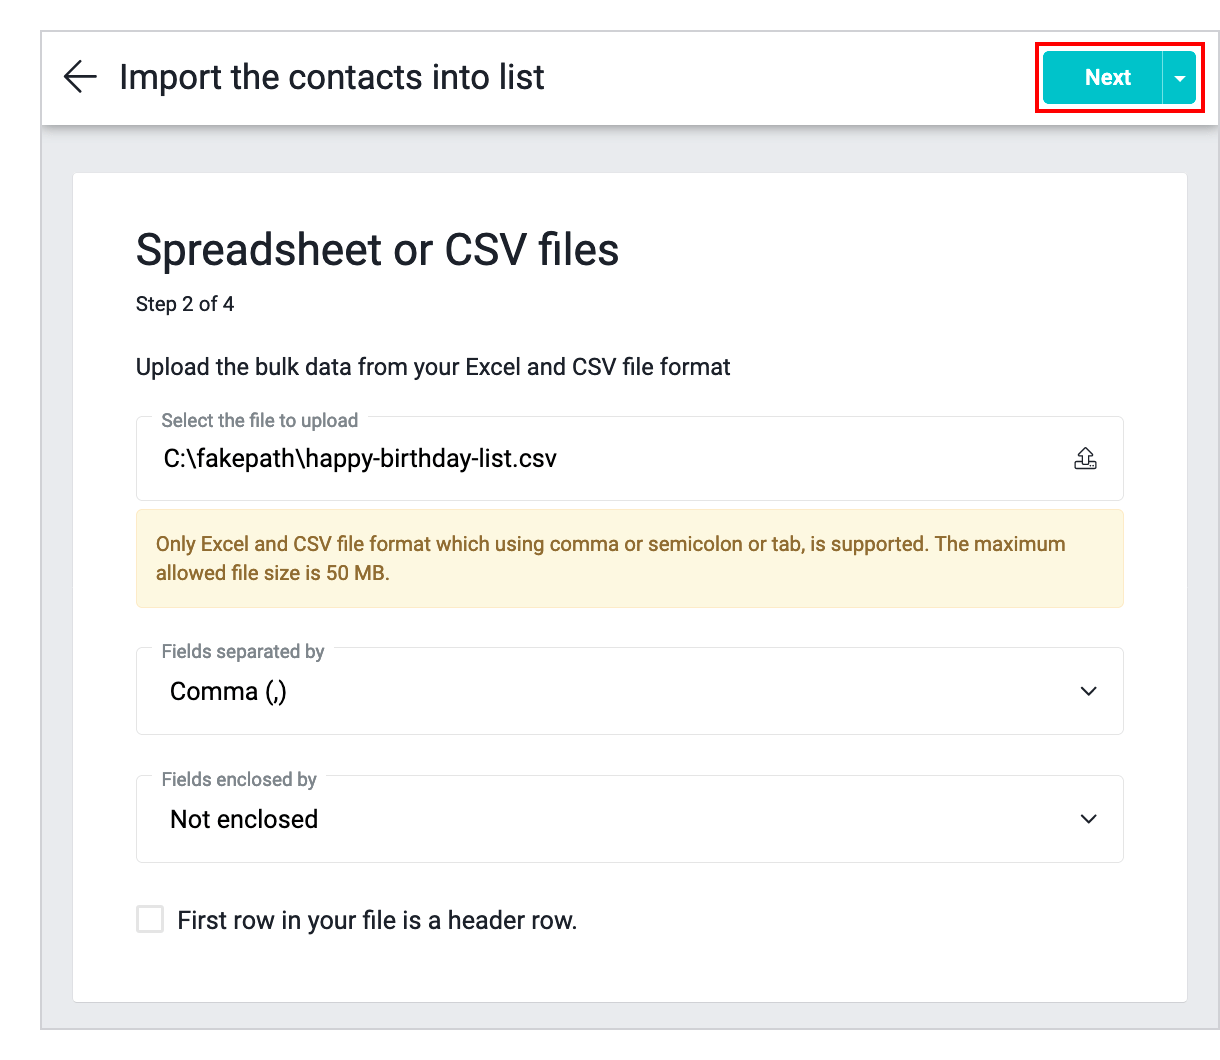
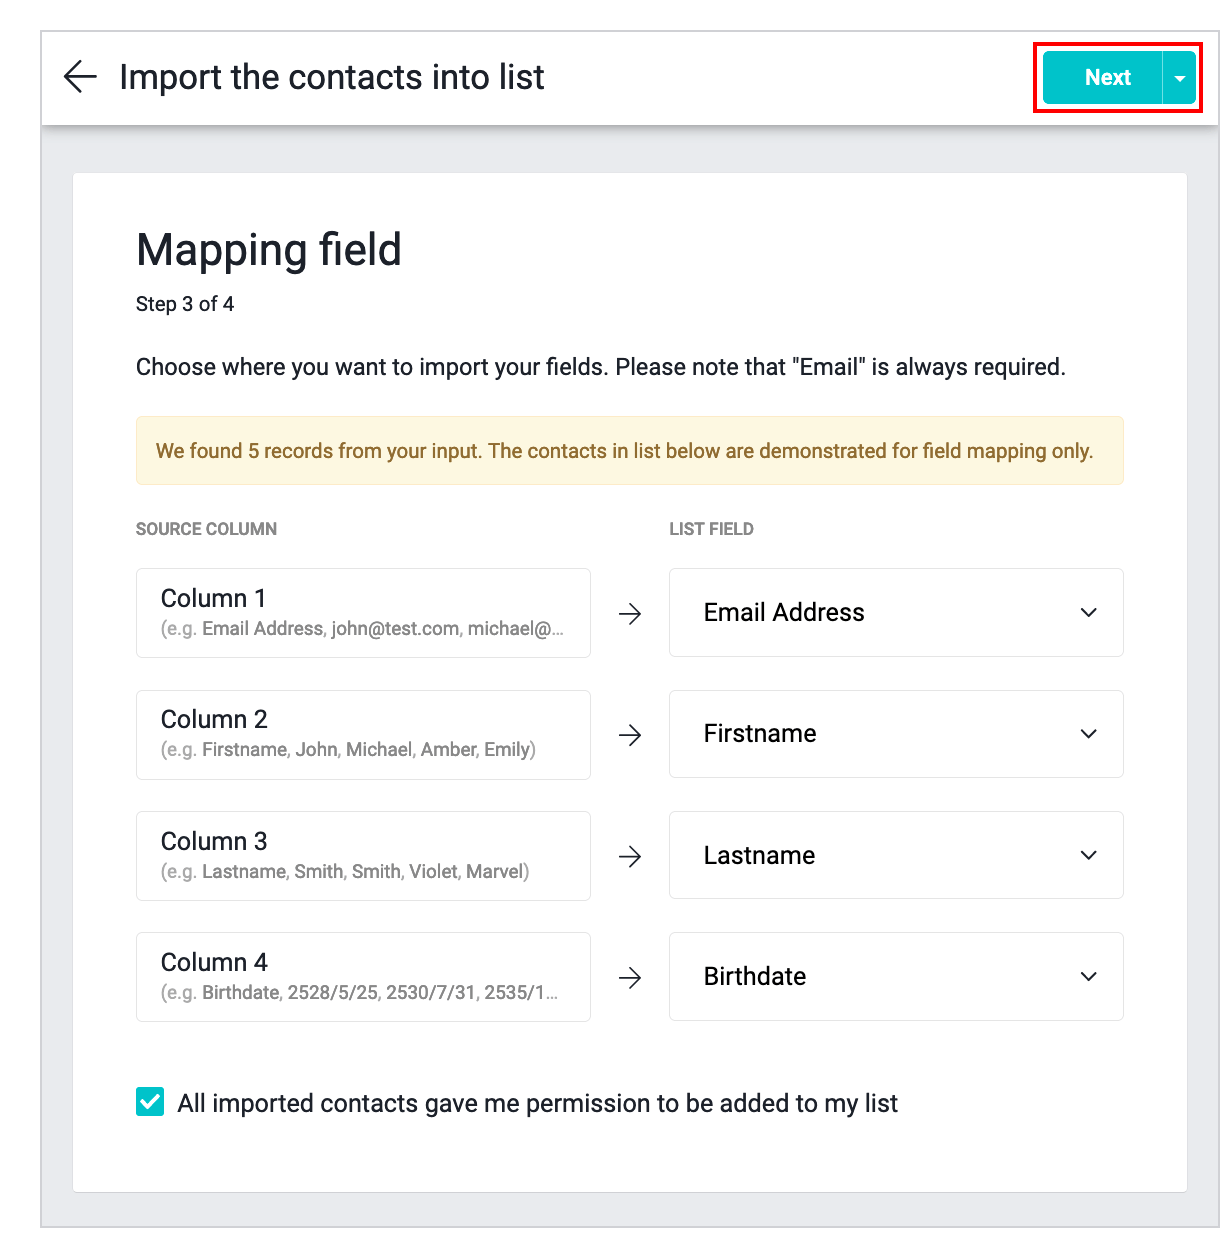
  1. Select Lists on the main menu.
  2. Click the plus sign (+) at the bottom right corner.

Create new list

  1. Select to create a list of Unique email type so that the system will list duplicate emails from your list and click the Next button.

Select unique email

  1. Specify the list name you want and click the Create list button.

Specify list name

  1. In the List settings section, click the Custom fields button.

Create custom field

  1. Click the Add custom field button. Specify the field name associated with the birthday and click the Data type dropdown. Select Date so that the system stores birthday information in the format YYYY-MM-DD (year-month-day) only.

Create custom field

Import contacts to a list

For the email list file, you want to import must consist of two important columns, including email address and contact's birthday, which must be in YYYY-MM-DD (year-month-day) format only.

HBD exemple

To import contacts to a list, follow these steps:

  1. In the All contacts in list section, click the Importing link at the bottom area of the list.

import the contacts into list

  1. Select Spreadsheet or CSV files and click the Next button.

Spreadsheet or CSV files

  1. Select the file from your computer and click the Next button.

Upload file

  1. Match the 1st column to the Email Address field and match the 4th column with a contact's birthday field. Click the checkbox ✓ All imported subscribers gave me permission to be added to my list. then click the Next button to start importing the email list.

Import file

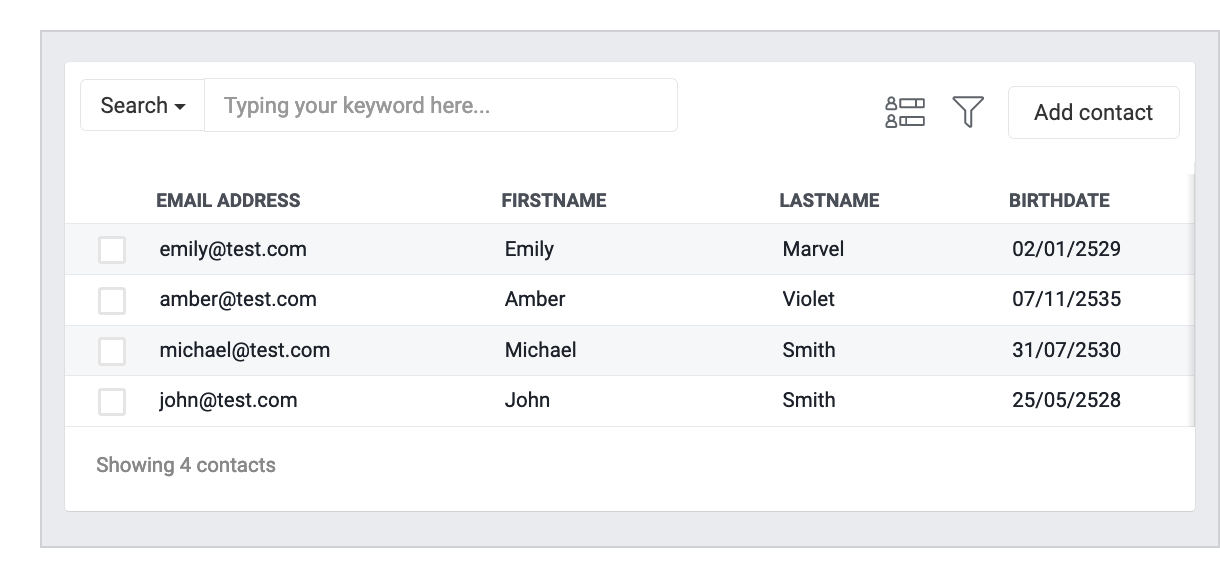
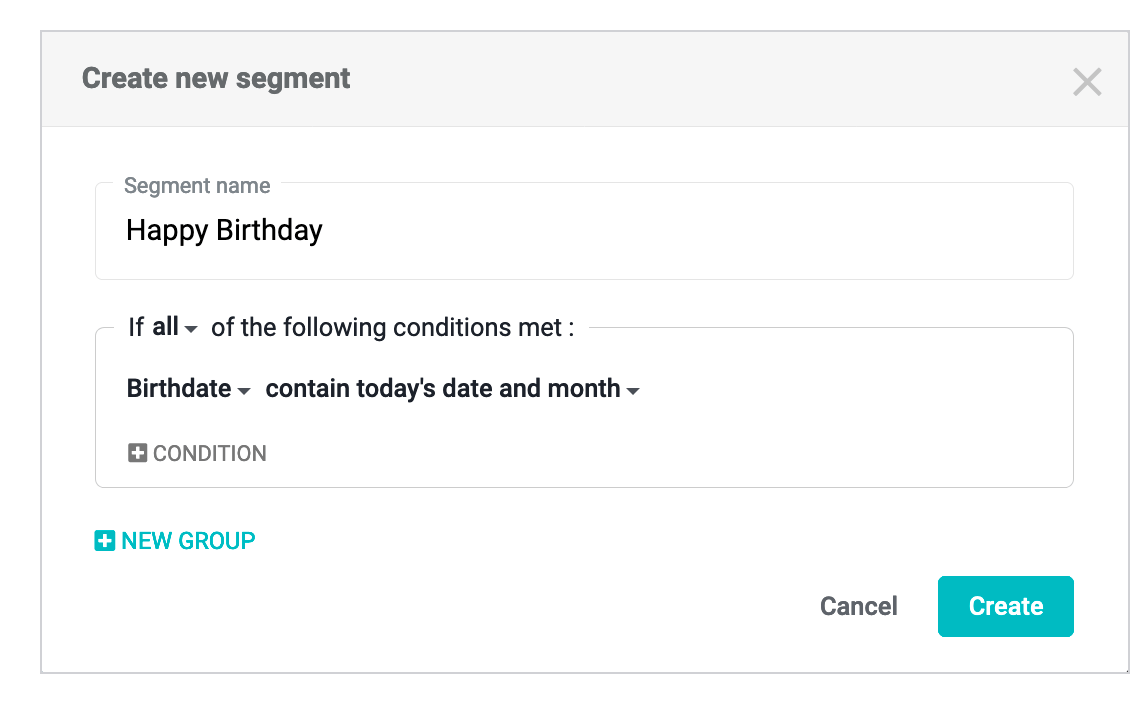
At this time, each your contact has a birthday information in the field. The next sequence describes the process of segmentation of contact from the birthday information within the list.
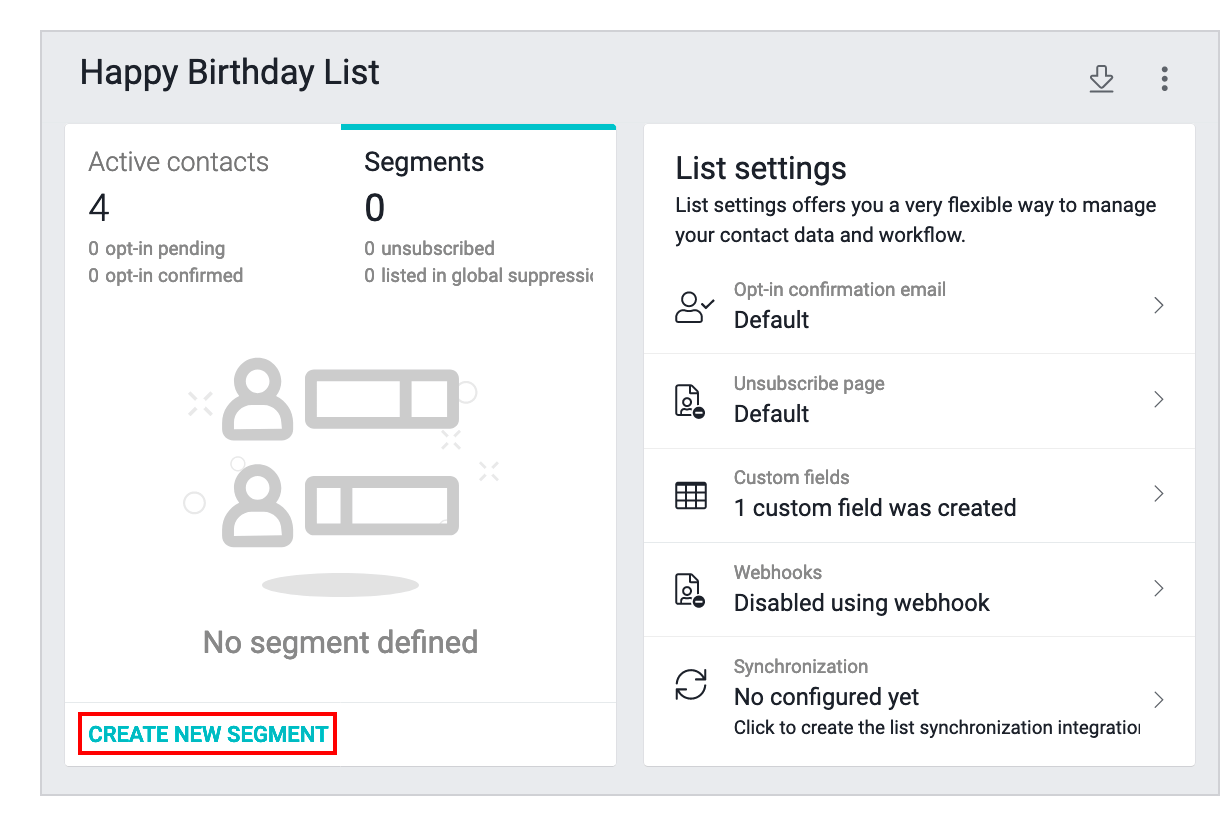
Subscribers detail

Segmentation of contacts from birthday

To segmentation of contacts from birthday, follow these steps:
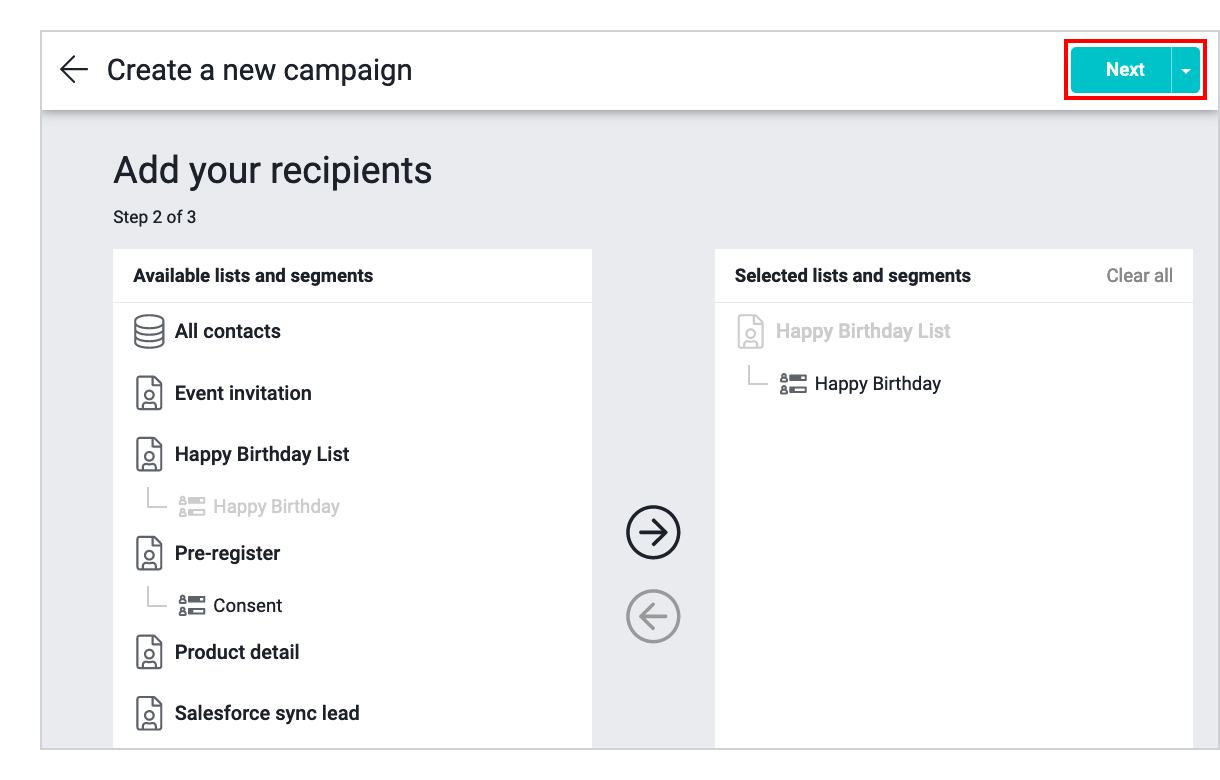
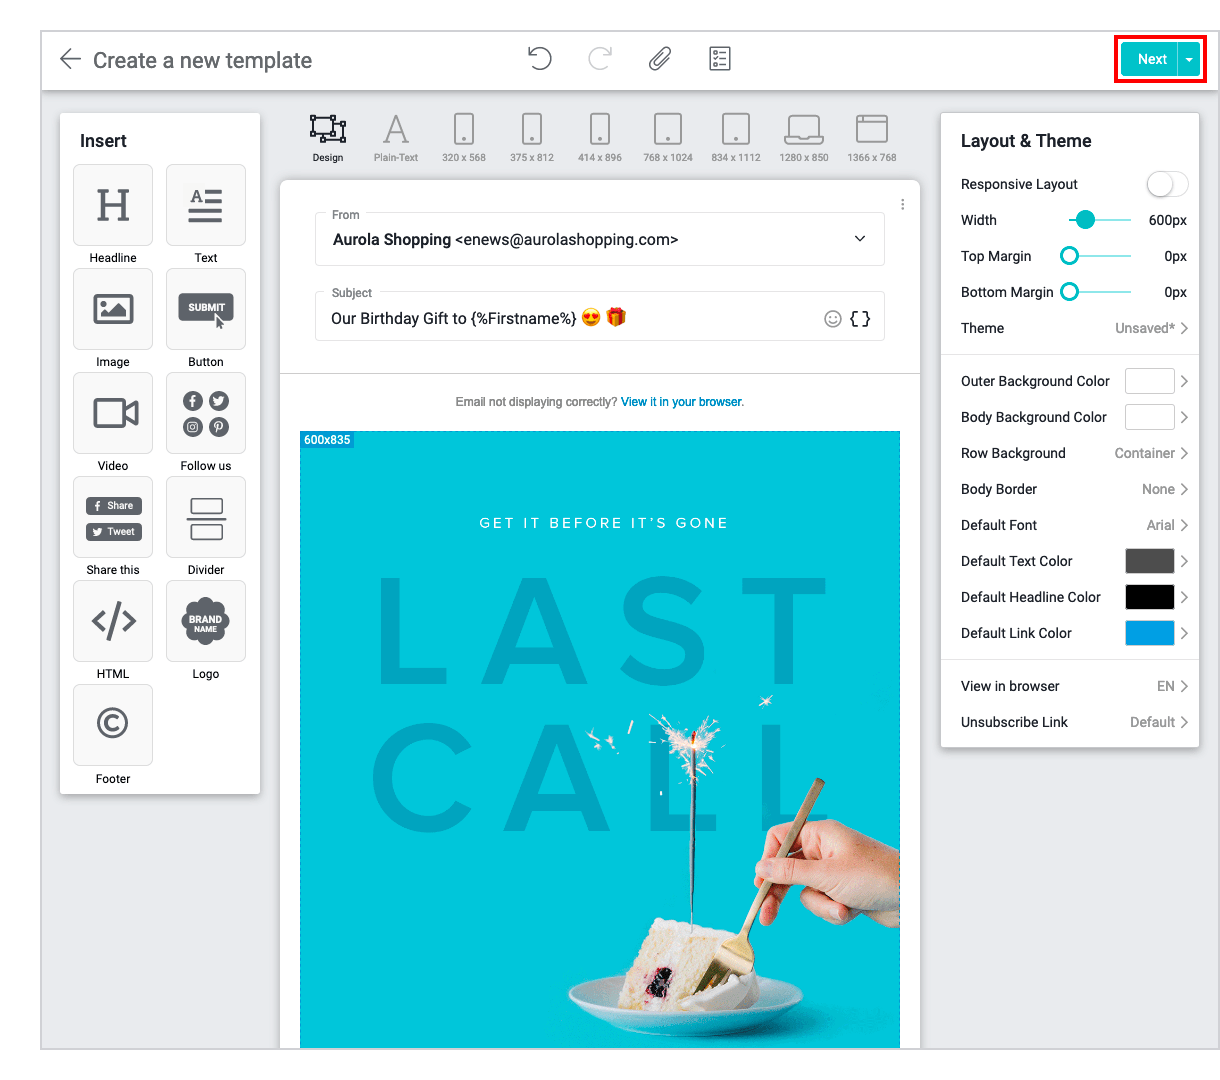
  1. Select the Segments tab, click the Create new segment.

Create new segmentation

  1. Specify a segment name. Click the dropdown to select the field to store the contact's birthday as Birthdate and the condition of the segmentation as contain today's date and month then click the Create button.

Create segmentation

Create a Happy Birthday campaign

When you are ready to send a Happy Birthday campaign to a contact whose birthday is exactly the same as the segmentation you created. You can start by creating a new campaign or click the name of the campaign you want from the Campaign / Draft menu and follow these steps.

To create a Happy Birthday campaign, follow these steps:
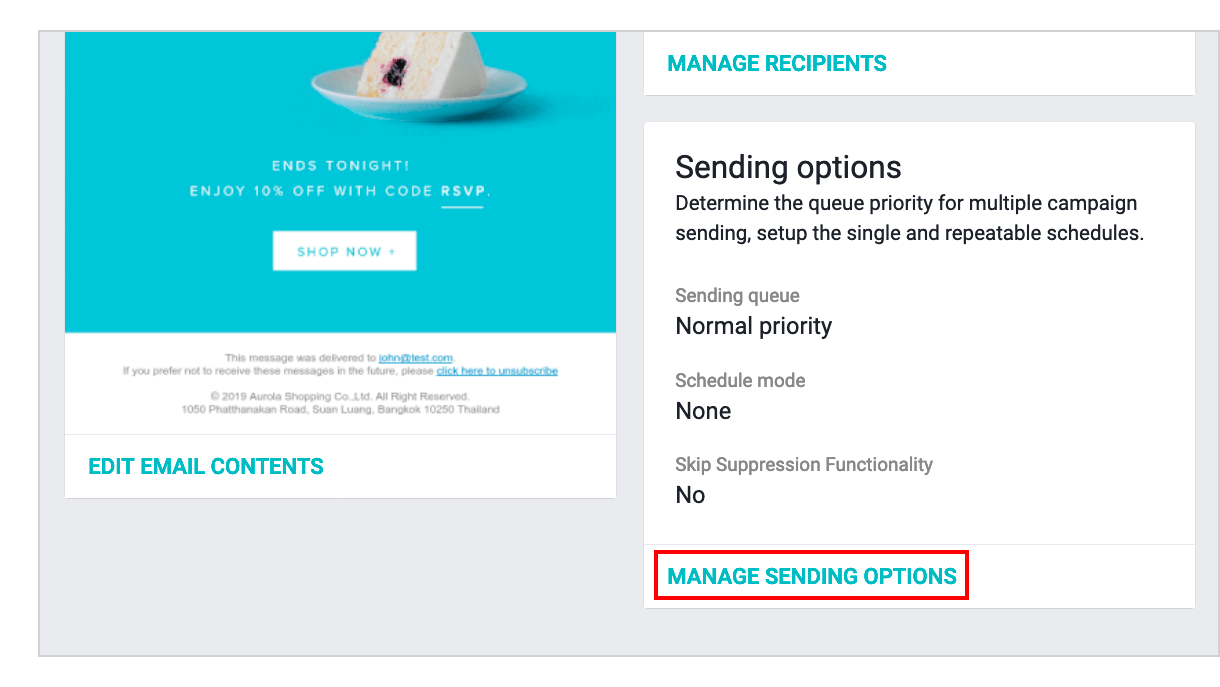
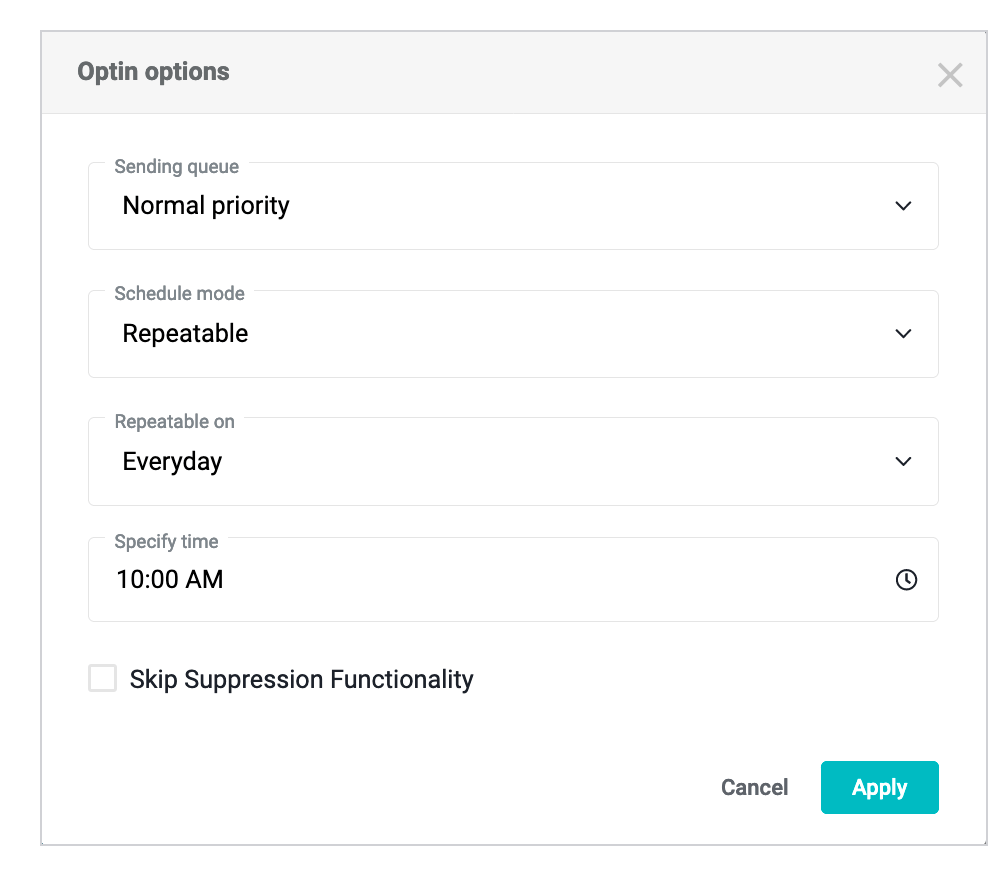
  1. Select Campaigns on the main menu.
  2. Click the plus sign (+) at the bottom right corner.

Create new campaign

  1. Select to create a Regular Campaign and click the Next button.

Regular campaign

  1. Select the segment for sending Happy Birthday campaigns and click the Next button.

Add your recipients

  1. Select to create a Start from Scratch layout or select the other options and click the Next button.

Select the layout

  1. Start designing your Happy Birthday campaign by dragging and dropping content block you want into the layout to add and format text, upload an image, attach a link to a website or download file, and more. When the design is finished, click the Next button.

Drag and drop

Set the time to send your campaign

To set the time to send your campaign, follow these steps:

  1. In the Sending options section click the Manage sending options.

Manage sending options

  1. In the Schedule mode section, click dropdown menu and select the Repeatable option. In the Repeatable on section, click dropdown menu and select the Everyday option. Select the time you want to send Happy Birthday campaigns to your contacts. Then click the Apply button

Manage sending options

Note: Refer to the time zone set from your account.

When the setting is finished, your Happy Birthday campaign will be moved to the Campaigns / Repeatable menu to wait for the time to be automatically sent.

Title
Title SEO [Optional]
Description SEO [Optional]
Friendly URL [Optional]
IFRAME Content [Optional]
Priority
Markdown
We use cookies
This website uses cookies to enhance your browsing experience on our website, to show you personalized content and targeted ads, to analyze our website traffic, and to understand where our visitors are coming from. You can manage your preferences by clicking Change Preferences. Learn more about this on Cookie policy
Change Preferences
Accept All